Leaderboard


Popular Content
Showing content with the highest reputation on 01/12/2021 in all areas
-
I bought the Rise of the Necromancer expansion, and I was looking for people that I can play with. I had good fun playing with my brother on local, but I'm not sure if he's stil playing or not. I was part of Clan DA, but the site is gone and I doubt very seriously if I can connect with any of the players that were part of that forum.1 point
-
You could just be the first adventurous player willing to try out "Free For All" - and for that I salute your bravery!1 point
-
Just a thought crossing my mind... if I am the first one noticing the double bosses since release of EE 3... am I the only one playing Sacred 2? Or is no one else beating bosses?1 point
-
Yes, this one was doubled, too. But it didn't move so it looked like an octo with 16 tentacles. xD1 point
-
A soundprofile issue. The items in question do not have a pickup or drop sound assigned and happily take the sound from the next pickup/drop entry available.1 point
-
It's "fx_BOOST". The FX is assigned via s2core.cTypeMgr::getFXTypefromBonus. The function receives the same input ID from all consumables with a duration.1 point
-
*gasp* I will see it as a feature until it kills me too often. Then I will come back and complain about the bug. xD Double Octagolamos stun incomming. xD1 point
-
It's undoubtedly Free-For-All Quests that's causing it. If I guess right, the same thing will happen to all of the campaign bosses. Maybe we can just call it a perk of the module? This has to be changed manually by the user in options.txt in the Documents folder. He drops a Wol Sigil (physical relic). The magic relic reward was moved to the Lightning Lord. These changes were made in 2.4. Yeah I never figured out this one. I think some generic sounds are getting applied but I'm not sure where the error is. I've also heard rings produce a potion sound.1 point
-
My favorite and scariest boss of all time... just loved the suspense if trekking through all that distance and then slowly making your way through the corridors to make it to the final battle. Great take down! gogo1 point
-
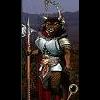
Perhaps, the most dangerous opponent that our heroine, the High Elf, has encountered as of yet is the terrifying giant scorpion known as the Garganthropod. This particularly pernicious pest can cause poison damage over time with the sting from its tail, but it also has a Reflection Shield B which reflects combat arts, such as Glacial Thorns back at the player. This dreadful Boss Monster may also conjure two mutated scorpions which can deal magic damage that may weaken an opponents armor resistances. Let us now see what transpires, as our brave lady breaches the entrance to his lair.1 point
-
I think I have a problem with a double variable: I think that should be a singleton. I am not mad about double XP and items, though. Quest was solved after the first one fell.1 point
-
The fearsome Harpy Queen is a particularly nasty Boss Monster with an icy lightning Combat Art which causes damage and may also remove one or more buffs of her opponents. She also has a fiery buff of her own to do fire damage to any target within range. The determined High Elf now has only a maze of caves between her and this formidable and malicious beast.1 point
-
Found several places with young 'Gemeine Samtfüssrüblinge - common satin feet beet-ling' yesterday. They are related to the Enoki mushrooms, just wild and not cultivated. Gave them to the kids for food experiments. I would take a bundle, wrap bacon around it and put in on the grill, or a soup, or... Wonder what they will do.1 point
-
The watered field is frozen. But skating is not the same. There used to come near 100 kids each day...1 point
-
Personally I dislike antifog sprays. I never know what they will do to the coating of glasses, lenses and visors. Another problem is that working with explosives needs antistatic visors. So we use microfabric pouches which contain nano particles for our visors. It reads that you have to wash your hands after use and that you should ask your glasses manufacturer if it affects the coating and is of any use. To be useful it should stick on the coating of the glasses without damaging it. If the glasses have a buildin antifog nano coating allready then the antifog pouch may be contaproductive. Also the antifog pouch has to be applied after cleaning the glasses. Else you will loose to much of the nanoparticles. For me corona and work are mixed feelings. At work we have to trust each other anyway because we work with explosives. So people with signs of a cold stayed at home even before corona. The more problematic thing is: testing new metal components has to be done at the place of the customers. Mainly mid in production buildings. So my normal tests there are currently around 2am. Last shift ends 10pm for most companies, so 4 hours all ventilators on full power, desinfection, then testing for about 2 hours, then companies do desinfection again and vents on full power.1 point
-
@Delta! You may want to review this list of products to prevent that annoying fog-up of your glasses.1 point
-
Important note! : This is currently a work in progress as this my first time posting a build on darkmatters ever. It will be updated gradually by taking the remarks, comments and constructive criticism made here. Thank you in advance for your patience Disclaimers: This build is for the Enhanced Edition mod from the good people of darkmatters. Kuddos for the mod Flix !! Much appreciated . You can find the current version of the mod here -> Sacred 2 Enhanced Edition mod by Flix. Also, the first build I've made using this has been done WITHOUT expert touch ... tough, after some experiments, some tweaks allows the build to work as well (but this will be discussed later as I still need to sort out a few things for the Expert touch version). General Concept: Everything is in the name. This is a mostly caster based Seraph build using CA from ALL three aspects. And the general idea is to spam both crowd control and damage base CA with such speed that it is difficult if not even impossible for the opposition to muster a clear offense or defense. 1. The Skills of the build: (W.I.P. : As I still need to ascertain a few things about early levels, the skills will be organized by 'group' and with general ideas about how to spend your skills rather than specific time as to when to take said and said skills. Hopefully, later on, it will be more specific as how to precisely spend your skill points). The "Core" focus skills: Exalted Warrior Focus : Very important for the dashing alacrity skills which will, obviously, be one of your major +% to attack and spell casting speed boost source. Revered Technology Focus : This focus skill is important for both some of your main crowd control CA but, and more importantly, to boost both your shields CA. And being able to soak damage and defense in general is VERY important in EE. (where getting one shot killed is all too possible). Celestial Magic Focus : This one is important for "Gatling gun" part of the build, since a lot of the spells you will spam will be from the Celestial magic tree. So getting very low regen times there is important. Especially since Archangel's wrath will be a very good, not to mention, a very interesting source of damage. Damage boosting skills: Celestial Magic Lore : Probably the main source of your damage. If you need to boost your Seraph capability at some point, this skill is probably where you'll need to put points. Revered Technology Lore : This is lower priority as far as damage boosting capability go but don't slack too much there. It still matters. On top of that, it will boost your shield capabilities. Ancient magic : This is the least priority for your damage boosting skill ... at lower level. At higher levels, however, this is where this skill is starting to shine though you will need to master it to feel its full effects. Defensive skills: Armor lore : Pretty much standard in most build, and this one is no exception. An all around very useful skill to have for both the bonus to armor and being able to don higher level armor. Among defensive skills, this would be the first to master. Toughness : Lower priority than armor lore above but still, oh, so useful. And while the additional armor points are very nice, it is, most of all, the damage mitigation to all channel that really seems to have the most effect here. Shield or Warding Energy Lore : You pick one or the other. My first and current attempt has been done with the shield lore. Mostly, you only need to put 1 point here and let the +Skills items do the work for you. It will allow you to use very high shield items and, using the different weapons slots, can boost your seraph in varieties of ways and give her much more needed flexibility. That being said, in hindsight and after a few tests, Warding energy lore might the superior pick here though it will significantly impact how you spend your points. From my (limited) experience there, if you pick this option, your shield becomes more important meaning you'll probably have to spend more points in the Revered technology skills. But, clearly, a more than viable option (especially with the shields capability to reduce flat amount of damage in addition to damage mitigation and the additional "life" points given by the energy shield. Concentration: Concentration : Yep! This skill gets its own category! First of all, it allows you to use another permanent buff ( which from now on I'll call "aura" as opposed to buff which will refer to dashing alacrity-divine protection). But, most important of all, it will allow to reduce the regen times of ALL your CA, including your "auras". The Combat Arts: Exalted Warrior: You're gonna use them ... a lot. Yep, I know, strange for a caster build but there you go Dashing alacrity : Obviously the most important CA of all here. It boosts a lot of important things in this build, namely speed (especially casting speed), but, also, lowers regen time with the right mod. Mods : Bloodlust : VERY IMPORTANT! Boost all of your CA speed which is pretty the core idea of the build ... to spam them. Ardor : VERY IMPORTANT TOO! It reduces ALL your CA regen times and since we want to spam the CA and combos all the time and chain them one after another ... it helps a ton in that department. Impatiance: Somewhat lower priority than the other two but still, oh so important. The main idea behind this mod is to reduce the time between two Buff combo to the shortest amount possible. For it is when both you alacrity AND divine shields are down that you are the most vulnerable. And this mod mitigates this A LOT. Battle Stance : Now, most caster builds tend to make a pass on this one. My advice with this build, DON'T ! It is of course only to be mod after Dashing alacrity but it still has its uses. First of all, it boost your defense substantially, and, in EE that's never to be considered a luxury. Also, and with the right mod, it can boost your Archangel's wrath damage ... and this is a very important CA. Keep that in mind. Mods : Agression : increase weapon damage. useful for assailing sommersault ... but ... also boost Archangel's wrath damage output ... hehehe. Flexibility or Drill : Dealer's choice here. I did my version with flexibility for early added evasion though, in hindsight, Drill might be the superior choice here since it will allow you to boost that "aura" much faster and to greater levels early. Retaliation : Quite useful to have against close combat mobs, champions and bosses. Even at low levels, and by stacking other similar modifiers, this will reduce the amount of hits your energy shield will take making it last MUCH longer ... and possibly until you can recast it again which is the main idea behind this mod. Assailing somersault : The lowest priority CA in this category but, also, in the whole build. That being said, it has a ton of use at later levels. Spurt or athletic : Dealer's choice here again, but Athletic (which is the one I am using) seems the be the superior choice here. It will help you spam it more and increase the effects of a later mod. Impetus : It is mostly used to give splash damage capabilities which can allow you to 'spill' some secondary effects like stun to other mobs ... but honestly not much to say here. Concussion : Now, this is where the CA starts to shine as it basically adds another crowd control weapon to your arsenal. Not the main one by far, but it still has its uses. Celestial Magic : Now, this is where the bread and butter of the build resides. You will find a ton of useful abilities here, crowd control, damage, "auras" (especially the sublime protector) and whatnot. Archangel's Wrath : One of your main ability to deal damage. Also, since most items modifier will consider this as a "weapon based" damage CA, this will allow you to use items that are generally meant for more direct combat oriented build rather than caster based like this one. This add a much welcome flexibility in items you can use and, from my point of view, increase the viability of the build overall. Red Hot : I personally prefer having more damage on one bolt than two bolts. It spreads the damage less and make the combination of critical hits + ignore armor quite dangerous! Explosive : One of my favourite mod for this CA. Essentially turns it into a splash damage/mass killing mob engine of destruction. Really nice! Also, you don't need the 'target seeking' mod for reasons we'll talk later! Vulnerable : From what I see, this massively increases damage, much more than increase the chance for secondary effect does, at least for this build. Baneful Smite : Another major source of damage ... and one that add crowd control to boost. Primordial for build. Laggard : Decrease movement speed ... EXTREMELY important against everyone but especially mobs and champions. Combine this with other movement speed reductions effects, spam sonic vortex, toss a good amount of spread out radiant pillars and let the ensuing hilarity ensue! Not only will your crowd control massively confuse monsters, but combining this with movement speed reduction drastically magnify the effect! Try this build against some very strong undead once it is established and you'll see why Potential : Chance to weaken opponent. Very, very useful to get those monsters, champions and bosses closer to your death blow range and pile on them with Archangel's wrath for a massive damage boost! Chain : EXTREMELY useful. Not only does this turn the CA into a nice crowd damage CA, it will also spill out the movement reduction to a whole host of monster. And since you're going to spam it a lot ... well ... monsters will slow down sooner or later ... and generally sooner with this mod, just saying. Radiant Pillar : This is where the build gets his "mentalist" part of the name. Being able to spam this with "hypnotic" mod, in combination with other mods, is absolutely hilarious ... not to mention devastating. And when your build starts to be established, you will feel its effects on mobs and horde of monsters (I use the "superpawn" option of EE by the way). This will confuse monsters by shoving them around mindlessly while dealing damage at the same time ... and of course, while there are being pushed around like balls in a pinball machine, they won't be attacking you. Héhéhé. Hypnosis : We had to pick this one ! I mean, come on, a mentalist build without this mod, please? More seriously, this will allow to play "pinball" with the monsters, dragging them left and right helplessly while you will be able to wail on them with relative safety by spamming your combos left and right! The rest of the mods are quite negotiable but I went for increased area of effect (makes the CA easier to use and seems to trigger hypnosis more) and deathblow (overall more damage, though it won't be one of your main damage dealer same as sonic vortex, can still be respectable there tough). Sublime Guardian : In the overall picture of the build, this is a lesser priority mod ... but! At the early level stages, incredibly useful and potentially life saving, especially in combination with the "conversion" mod. This can turn around some very difficult massive mobs fight to your advantage (not to mention reduce the pressure on your energy shield due to the chaos this will create). Strength of faith : Increase the damage capabilities of your sublime guardian. Also, since you will a metric ton of casting speed, simply recasting when your guardian dies will be trivial, lessening the effect of additional armor for your "bodyguard". Fervor : Same as above except with attack speed and defense replacing damage and armor. Instill belief : After a few tests, this is clearly the superior option with this build. Since you won't be overly focused on your guardian, the instill belief alone will help you in difficult fight in a way that her own version of archangel's wrath won't be able to (also its damage will really pale in comparaison to your own ... well ... wrath . On the other hand, the instill belief WILL turn difficult battles to your advantage, especially at early levels), but later on too). Cleansing brillance : The lowest of lowest priority in this category ... though it has its uses. Honestly, only the first mod that reduce attack speed will be useful here ( I am at level 156 nionum ... and still only got 1 mod here to tell you the truth. Distract : This is the only mod that I took ... And the only I have at level 156 (though I took it much sooner). You really don't need more there ... just more levels to increase its effectiveness and that's all. Increase "aura" damage against either T-mutant (bof) or against undead (AHAHAHAHAH!! what a joke ) ... not really useful. As for the last mod, you can use +% to CA area of effect for the same thing (and it will be more useful to boot since it does so for everything ,pillars and so on). Revered Technology : Sonic Vortex: Another source of crowd control capabilities ... and so hilarious to boot. When combined with radiant pillar and Flaring Nova ... well ... monsters, champions and even some bosses won't know what's happening to them hehehe. Reverberate : This is another important cornerstone of the "Mentalist" part of the build. Combine this with radiant pillar and turn your Sacred 2 modded game into a combat version of pinball !! Echo-Harmonics : Honestly, its dealer choice here. But sonic vortex area of effect and range seems more than enough for the use of this build so I went for echo for damage over time. Compression : For the death blow. Though, to be fair, while the sonic vortex damage is quite respectable, it won't be your main source of it. That being said, still nice to have. Flaring Nova : The final crow control 'manager' here and of particular note. It seems stun is one of the few modifiers that can work on bosses (hypnosis and knockback don't) so this, in combination with assailing somersault can help a ton with bosses (in combination to reduce %attack and movement speed). Expand : you clearly want a Flaring Nova's radius for this build there's no question about it. Against mob and champions, it will massively increase its crowd control capabilities and, against bosses, allow to get a stun from a safer distance here and there. Personal experience has proven this is clearly the superior choice there, especially if you combine it with +% CA area of effect modifiers. Stun : Superior choice here again, no questions about it. The addition of stun will give you even more crown control capabilities and, as said above, can give you an edge against bosses especially the most difficult ones (again, stun seems to be the one debuff that seems to constantly work against bosses, still need to be confirmed though). Laggard : Sounds like deja vu? Maybe because we have the same modifier on baneful smite perhaps? In any case, those two clearly seem to combine and make the compounding effect of slow down + "pinball" abilities even more effective. Very fun ! (come on here you undead people I dare you HAAHAHAHAH!!! ) Divine protection : Probably the most important defense oriented CA of the build. It can make your Seraph incredibly resiliant ... especially combined with a very high willpower (lots of energy shield points) and the mitigation to all damage channels. As for the spell reflection ability of this CA, that's icing on the cake and quite, quite useful against some deadly mobs (like some of the eyes in the "swamp forest", fen fires and some bosses). Steadfast : After more than a few tests at the beginning, I ended up with this mod. At early levels, it is quite the lifesaver to have additional energy shield points vs more damage mitigation. But, more to the point, the very big amount of additional willpower will make any lightsaber that much more effective ... especially with archangel's wrath (though once you get to niobum stage, this part of the mod will substantially lose its effectiveness). Warding energy shield : Also important but less than Divine protection. The drawback is that it will make downtime between two divine shields a bit longer which can increase your vulnerability (though it can be somewhat mitigated with casting speed items). Projectile reflection and Magic mirror : Having both will add additional lines of defense. And, in general and from my own experience, the way Enhanced edition seems to work, having different sorts of this kind item modifier protection can work very well at any stage of the game. It seems that combining as many "different lines of defense" (armor, damage mitigation, energy shield damage reduction, block to, reflect chance to) has a positive compounding effect for any build (at least as far as resilience is involved). Block or resource: Dealer choice here. But, honestly, both can work very well. Block can give you an additional line of defense (as per above) especially if you go the energy shield skill route, but Resource can allow you to push that CA further with run. Again, dealer's choice here. You can forget about BFG, I did try to use it for specific bosses (namely some of the elemental lords), but, apart from that, I never, never use it. General point spending strategy (skills and attributes) : (This is probably the most W.I.P. section of all, expect changes here overtime). Now (or for the moment at least), this is not going to be the kind of build that will tell you *spend XP points there and there, at such and such levels, but, rather, I will try to give you a general overview of the important points to take into account with this build as far points spending goes. There are 4 main categories of importance when doing this, namely : A) Regeneration time (focus skills & Stamina) ,B) CA max levels (focus skills), C) General defensive capabilities ( mostly defensive skills but the focus skills also play an important part there!, the same can sometimes be said about vitality) and, of course, your D° damage dealing capabilities. And I remember seeing a build that seemed similar for those points recently here, a Revered technology based seraph (I'll try to post the link when I find it back). As you will see later, having low enough regeneration times (and generally very low at that!) is of prime importance in this build ... and how low you must get depends a lot on your casting speed! ... And since your casting speed can be improved in a variety of ways ( stamina attributes, Dashing alacrity and +%casting speed items modifiers), it is quite difficult to give precise pointer there. What you will always need to do however, is to make sure your combo regen levels are low enough that you can chain them immediately one after another in combat (and perhaps with some allowance for when you debuffed with things that slow your regen times). At the early levels, that means that practically all your attributes point will be spend on stamina. And a good bunch of skill points will need to be spend on the focus skills ... especially Exalted warrior (for regen time and casting speed) and Revered technology focus (for defensive and crowd control capabilities). And in general, the categories A) and B) will be your main focus for a good 20 levels I'd said. That being said, don't make the same mistake I initially did which is slacking off on the C) defensive skills, and most especially the armor skill. It will majorly contribute to your damage soaking early on (in fact the whole game but it will be more dominant at early levels). Also, opening Concentration relatively early can be a great boon (two "auras" will help a ton, mostly for defense and a bit for offense) and will help with all your regenation times. So, to recap, until around 20 -> Focus more on Exalted warrior and Revered technology focus more than anything else while still spending a good enough amount of points in armor. Also, make sure you have some of D) damage categories opened (but not Ancient Magic, at early levels it won't contribute enough compared to the two lore skills). After level 20, placing more skill points will start to have a diminishing effect and you can start to spend more points in the other skills. Also, after that point, and provided your regen times starts to be more comfortable, placing points in vitality here and there can be a real life saver for when you're in downtime between divine shields ! (more on this later in the items section). The highest priority skills to pick first would be : Exalted warrior and revered technology focus, concentration & Armor. Middle priority skills : Celestial magic Focus firs (you need it for regen times), Damage lore for Celestial magic (most important for damage ! so probably first) and Revered technology lore (it helps with damage but less ... but it makes your energy much more effective). For defense, this is where you open toughness. The lower priority skills that you can save for last are: Ancient magic (while useful, it is more a thing for later levels), Shield (if you picked that option pick it last and keep only 1 point there), Once your regen times become comfortable enough, you can start focusing more heavily in things like the two lore skills, not only for damage but also to gain more hitpoints and damage soaking from energy shields. Once you have all your skills picked, things like Ancient magic will start to get more important for damage, the same way toughness will do for defense. And for a while, your focus skills will start to be far less important in skill spending ... until you start to reach the soft CAPS for CA at which point it will start to be important once again (especially for the Dashing Alacrity/divine shield Combo). As far as mastery goes, the 3 focus skills and concentration will generally be of prime importance not only for the regen time but, also, to be able to push your CA further in levels with runes. And for a good amount of time, your items will be able to take the slack for boosting your lore skills. Armor should also be mastered among the first skills (though you will probably need to master either two focus skills first or concentration alone first). I still have difficulty to pinpoint when to master Armor and, while it is probably not the very first one you should master, it should nonetheless be a priority. A few pointers on spending runes and CA levels boosting: The most important thing to keep in mind there is: Keep your regen times low enough as to be able to chain the combos one after another ( or, as I like to say, be able to "combos the combos", important for later, héhéhé). At regular interval, check what regen time is the ideal for that ... and keep a small margin for when you'll be debuffed with slow down effects (or don't and use concentration potions, an option, I'll admit, I don't use enough). If you regen times start to be 'too low' (as in you have a very large margin), this is generally a good indication that you can safely eat runes. Also eat a runes for one of your "auras" to check what effects it will have on your regen times. Now, early on, you will practically not be able to eat much runes, if at all (except for the first one). However, the items you will find and use will have a very drastic effects there and, at some point in the game, you will come to a point where you will, essentially, be able to keep your "auras" at max CA levels with practically no effects whatsoever on your regen times. I mention this because I notice a bit too late that I was able to safely gooble tons and tons of "auras" runes, massively boosting my Seraph capabilities with no real downgrade to speak of in my regen times. Items modifiers and Items sets of importance: (straps yourselves in girls and boy, there is a ton to say here ). Item Modifiers: +% to casting speed : One of the most important modifiers of all ... except you won't necessarily put that much there, at least in the start. Why's that might you ask me? Well, there are a few (hopefully simple) reasons for that: First of all, a good bunch of your casting speed will be provided by both your lore skills and (even more importantly) by your dashing alacrity. And if you stack too many +% to casting speed, the speed at which you will be able to cast them will not match the regen times of your combos ... meaning useless downtime between combo spam, meaning your %to casting speed is essentially wasted in that case. However, the lower your regen times get the more important this modifier becomes. And in general, you will find that you will need to make a lot of balancing as far as your regen times is concerned. Leading me to : Standard "Enhance" Blacksmith rune: Quite useful at the beginning to boost and reduce your regen time. However, don't spam them too much on your items as there is a drastic diminishing return on it. Still useful ... and gives +% to critical hit to boot. Not too bad, but there is a better blacksmith rune here .... Standard "Anneal" Blacksmith rune: Now, this one, I like a lot!! And by a lot, I mean a lot!! Unlike the other two blacksmiths runes, it does not have a diminishing effect and, as you move around levels and difficulty levels, its effect will become greater and greater. It combo really well with defensive skills (armor and toughness especially) making your seraph much more resilient. And for very difficult boss dishing a metric ton of damage, you can combine this with ... + to armor (flat number) and +% (percent!) to armor (both all channels but mostly single channel) : Combined with armor skill, toughness and Anneal runes, this can drastically boost your defensive capabilties against very though bosses who can dish out a lot of damage quickly (abishail, T-Energy Dragon, the annoying inquisitor boss at the end etc ...). When used well, a real life saver ... and not just with this build but in general where Enhanced Edition is concerned (personal opinion of course). +% damage mitigation (especially to ALL channel) : Very important for defense! One of the most deadly situation is to have your divine protection suddenly going down !! (generally due to downtime) This where getting one shotted by bosses, but, also by some champions (for example, I did died a couple of times in the underground tunnels under the Seraph island due to champion "dragonling" one shotting me with their "heat-seeking-missile-of-fire-death"). Stacking a healthy amount of damage mitigation in combination with toughness will drastically reduce the damage during divine shield downtime ... or simply reducing the damage you take overall (making it easier on you energy shield). You cannot imagine how different it feels between divine shield active and during divine shield downtime. In fact, without many or any +% damage mitigation, it gives me the feeling that ... my seraph is not decent, or under being under-dressed. ... Sorry about the crude joke, but it does express that reality of the build pretty well. That being said this item modifier item helps a lot. And there is another who helps as well in some situation or intermediate levels, which is ... +% to vitality : This is a very interesting modifier. In fact, due to the fact that I had unbalanced defenses, there was a point where I did found "Dedication" from virtues of the Seraphim set. And it did save me, or rather my seraphim from more than her fair share of untimely deaths, again, due to lack of defenses during divine shield downtime. It even go to the point where, during a good bunch of levels, I felt like I had to put points in vitality. I am not entirely sure it was perfectly optimal but, with this modifier, it did help a ton ... and for quite many levels. That is a lot of modifiers for defense, how about we focus on offense for a change (héhéhé!). +% to magic and fire damage: A very easy way to increase your damage and, from what I see, generally more effective than the "whelt" blacksmith rune. I prefer putting them on weapons/shield sockets as it allows me to switch between them depending on the situation and the kind of damage/CA/combos I need to use. By the way, let's focus on archangel's wrath for a while, there are at least a couple of good modifiers there .... +% chance to ignore armor : While the modifier text seems to indicate that you % chance to completely ignore the opponent armor, in practice, it feels more like ignore %armor of opponent. In any case, the more you add of those, the more you will see your Archangel's wrath damage substantially increase (but with diminishing returns). The "virtue of the seraphim" seems to be one of the best source for that ... as least personally for me so far. For extra damage ( and major butt-kicking! ) add the following modifier ... DEATHBLOW!!! aka "opponent level for deathblow" : which, again, makes the modifier name a bit misleading since it should say "If the monsters get at or below such % of its hitpoint, you weapons attacks will deal double damage." You'll notice I've marked two words in bold here. First, weapon, as it will only work (as far as I can see) on your achangel's wrath (since, as a hybrid CA, the game will consider it mostly a weapon based CA), which leads to the second word ... double ... and let's be totally and entirely honest here, it feels it add, oh, SOOOOOO MUCH more damage than just double. I am assuming the way critical hit works in EE is contributing a lot in this (and perhaps other things). In any case, once monsters get to deathblow hit point range .... your archangel's wrath will indeed feels like it can inflict a "deathblow" .... SPROTCH!! Pretty hilarious, and you when add the splash damage capability of AW, the end results ... lots of dead monsters, just saying +% to CA area of effect : Now that's an interesting one. I don't use often or all the time, but it can work pretty well with this build. It makes your crowd control much more effective, your pillar will deal more damage by virtue of being more often in monster range, and your flaring nova will get that much more useful against bosses to score stuns. Very interesting and, again, "virtues of the seraphim" is a good source of it (so are the gauntlet from sopor aethernis by the way). + to all skills : Clearly a useful option as it practically boost everything in the build. But there are better options namely, first ... + To defensive skills : More useful, at least for defense, as it is easier to find bigger bonus to that this way. It however pales in comparaison of.... + to OFFENSIVE skills : Now this is where things gets REALLY interesting. Take a look back at our skill selection, if you please, noticing something? ... Yep, we have 3 defensive skills ... AND 7 OFFENSIVE SKILLS. And those offensive skills, through energy shield and battle stance, also boosts your defensive abilities in addition to your offensive ones. In all those type of modifiers, very clearly the superior choice here!! + To specific skills : Also of important note due to the fact EE massively boost their gains. The most useful of them are those that gives + to focus skills. Quite useful to drastically lower your regen times when you need to. + to all CA, specific aspect CA or single CA's : A very useful item modifier which I discovered a bit late ... but which helps a ton. It can make all your CA much more effective without dragging your regen times too much. Also very useful to put in a specific weapons slots to activate your "auras" and boost them further this way. And, in general, can substantially boost your damage (especially archangel's wrath). I may have missed a few other modifiers like "Deathly wounds" or "+% chance to inflict weaken", those two can be useful against some bosses to accelerate the point where you can start piling deahblow on them, but their uses are much more niche. Still I managed to kill very quick regenerating monsters like the big bad werewolf or the succubus using a weapon slot specifically for this and, then, quickly switching to another with deathblow and dish out the divine justice of archangel's wrath on them, just saying The Combos, their uses and how they relate to each others: You will have all 4 combos assigned. Here they are (in order of how I placed them myself). Combo 1: Sonic Vortex to Flaring Nova. The first crowd control combo. One that is always useful and, as mentioned before, stun from flaring is one of the few crowd control CA that works against bosses. THis makes for a pretty good combo which is generally followed or preceded by ... Combo 2: Radiant pillar to Baneful Smite: The pillar will further confuse enemies and baneful smite will slow them down. Assailing somersault : Allows you to move around the battlefield and more easily target important monsters to take down first by jumping on them and then hit them with the next combo ... combo 3: Archangel's wrath to Baneful smite: AW deals a ton of damage especially with the right modifiers. Baneful smite can further increase the chance for a "fatality". If not, it gives you another chance to slow the monster down. Combo 4 : Standard Divine Shield/Dashing Alacrity combos. And speaking of combos, due to fast regen times and fast casting speed, you can ... well ... you can combos your combos! ;) So, combo 1 followed by combo 2 will be your standard bread and butter against monsters and champions. It can deal respectable damage due to combo spam while at the same time removing almost all ability for the opposition to muster a counter attack. Bosses and some champions however, will be much tougher: Against them use to to . Somersault to the though monster and deal a crap ton of damage with archangel's wrath and smite. If it's not enough sonic Vortex/Nova the Barsteward away. RInse and repeat your combos till monsters die ... which is generally very fast due to the incredible speed with which you can spam everything. Item slots uses: It can be very important in this build since having different options will make the whole ensemble much better. I'll show you an example of what I have so far: Slot 1: my Magic find slot. Put all the %chance to find items there. use huntress of light from class quest to boost it Slot 2 : Weapon/Shield to increase armor, damage mitigation, defense etc ... Don't hestiate to switch items there when facing the kind of opposition that can deal metric tons of damage. Slot 3: Darth's maul or any massive damage 2H weapon. For use with archangel's wrath mostly. Slot 4 and 5 : For casting speed and spell damage. And voilà, that's about the whole shebang so far If you have questions, don't hesitate to ask. And if I could ask a favor, could you ask me against which regions/bosses/mobs/champions you might be interested to see a demonstration for? So that I can maybe do a video to showcase how the whole thing works1 point
-
Greetings! Sorry for the late reply, I hope it helps you. If you want to focus entirely on Astral Lord aspect and ignore 'melee' combat, then my advise is to only use magic staffs and pump up Intelligence in a 70% ratio and the other 30% goes into Stamina for some regeneration reduction. This applies for the first 25 levels. After level 25 you should have enough regeneration reduction from items (I recommend learning Armor Lore skill early on, like at level 5 or 8 for more regeneration reduction) so instead of Stamina you will increase Vitality since you need some hitpoints as well. The ratio will be 70% Intelligence and 30% Vitality (you can alternate Vitality with Stamina as well after level 50 when you'll have 2 attribute points to spend if you feel like you need more regeneration reducton). If you plan to go a hybrid Astral Lord and melee build that uses Strength-based weapons (hafted weapons, swords or certain pole arms) then you won't need Intelligence at all. Between level 1 and 30 increase Strength (70%) and Stamina (30%). After level 30 you can replace Stamina with Vitality and maintain the ratio (70% Strength, 30% Vitality). After level 50, the ratio will be maintained as well and we want to increase both Strength and Vitality (70%-30%). Of course the approach is pure preferential, I just posted how I see the build from my perspective. Now it depends to your preference of weapons (Strength-based or Intelligence-based) because this will be the main thing that defines the attribute points spending. An other advice I can give to you is based on a personal pure Astral Lord Shadow Warrior Project I made some time ago. I just played Silver difficulty with it (up to level 70 or something like this) and I came to the following conclusions: interesting and fun to play type of Shadow Warrior and it can deal very well with both single targets (with Spectral Hand) and groups (with Rallied Souls and Neither Allegiance). The skill build was: Level 2 - Astral Lord Lore (75+, 1/1 ratio) Level 3 - Tactics Lore (75+, 3/4 ratio) Level 5 - Armor Lore (2/3 ratio) Level 8 - Astral Lord Focus (75+, 1/1 ratio) Level 12 - Concentration (75 point only, 1/5 ratio) Level 18 - Death Warrior Focus (75+, 3/4 ratio, used to reduce the penalty level of Grim Resilience buff) Level 25 - Combat Discipline (1/2 ratio) Level 35 - Magic Staffs (1/2 ratio, I was using two-handed magic staffs only to maximize the damage of Spectral Hand) Level 50 - Constitution (1/3 ratio) Level 65 - Toughness (1/3 ratio) Combat arts: 1. Spectral Hand (main combat art) a) Clout (damage increase) b) Intent (chance for critical hits) c) Destruction (increase all damage types of the Spectral Hand) 2. Skeletal Fortification (mainly used against bosses) a) Rapid Fire (fire rate increase) b) Ice Shards/Arcane Power (adds ice/magic damage) - preferential option c) Scatter Shot (adds one more projectile) 3. Rallied Souls (used when fighting groups after killing the first 2 or 3 enemies from it) a) Armament (soldiers will receive armor bonus) b) Demand (chance to animate more corpses) c) Contagion (adds a chance to turn enemies into undead servants) 4. Neither Allegiance (Buff; main buff used) a) Accomplice (summons an additional soldier) b) Spectral Shield (equip the soldiers with greatly enchanted shields) c) Elite Equipment (upgrades the soldiers' armor) 5. Grim Resilience (Secondary buff; our defensive combat art) a) Rejuvenation (increases the hitpoints regeneration) b) Discipline (reduces Grim Resilience's energy cost) c) Safeguard (increases physical resistance) *The other remaining combat arts slots can be filled with combos Attribute points spent: level 1-25: Intelligence (70%) / Stamina (30%) level 26-50: Intelligence (70%) / Vitality (30%) level 50+: Intelligence (100%, one point each level) + Vitality (50%) / Willpower (50%); one level up Vitality and the next one Willpower and so on I hope this mini-guide was helpful in any particular way.1 point